
- Creating Events with Sesh
- Step 1 — Select “Create Event”
- Step 2 — Check for an Existing Template
- Step 3 — Select the Appropriate Template
- Step 4 — Enter the Event Title
- Step 5 — Choose the Event Date and Time
- Step 6 — Enter the Event Description and Location
- Step 7 — Configure Event Notifications and Roles
- Step 8 — Add an Event Image
- Step 9 — Configure the Attendees Role
- Step 10 — Configure Discord Integration Settings
- Step 11 — Optional: Recurring Events
- Final Review Checklist
Creating Events with Sesh #
This guide covers the standard procedure for creating events for the [RS] Rogue Soldiers Clan using Sesh.fyi.
Before starting, log into Sesh using your Discord account and select the [RS] Rogue Soldiers server.
The goal of this process is to ensure that all events are organized correctly, use the proper roles and voice channels, and integrate properly with Discord native events.
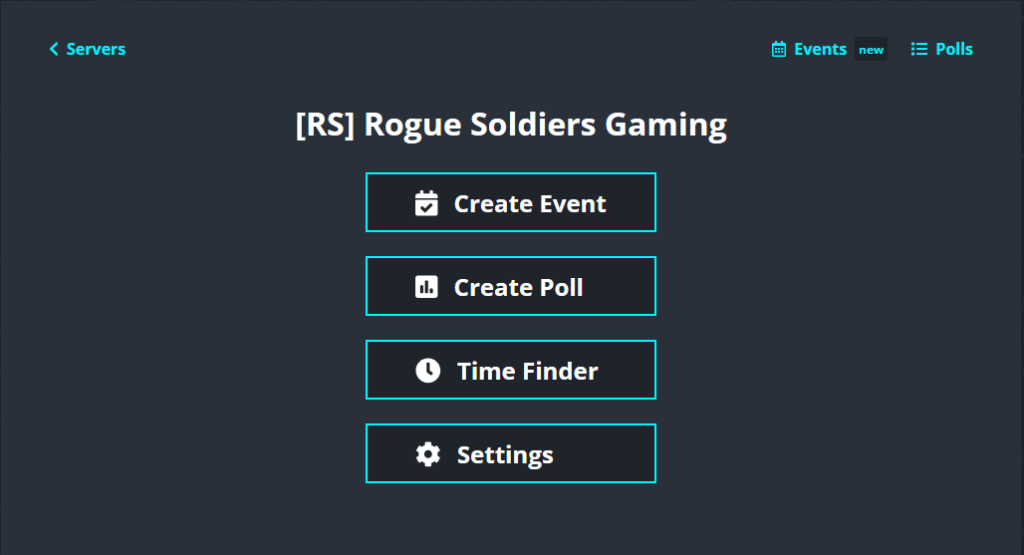
Step 1 — Select “Create Event” #
Once inside the Sesh dashboard for the [RS] Rogue Soldiers server:
- Locate the navigation/menu area.
- Click the Create Event option to begin creating a new event.
This will open the event creation interface.
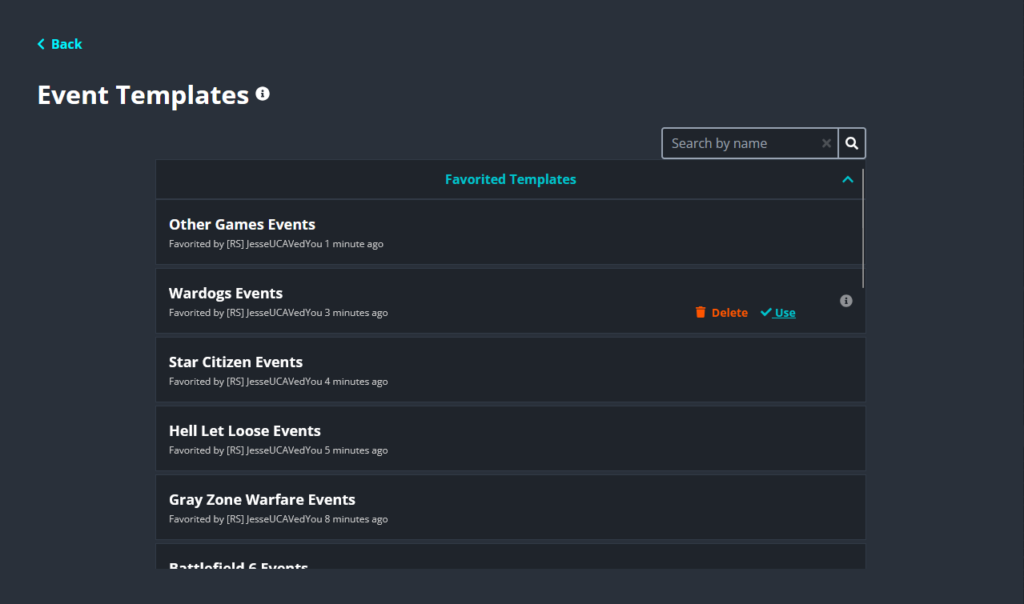
Step 2 — Check for an Existing Template #
Before manually configuring an event, always check whether a template already exists for the game, activity, or event type.
Templates help ensure:
- Correct roles are selected
- Event notifications are configured properly
- Event images are already assigned
- Discord integrations are already enabled
- Consistent formatting across all events
Click the Template option or template selector area and review the available templates.

Step 3 — Select the Appropriate Template #
If a template exists for the game or event you are creating:
- Select the appropriate template from the list.
- Verify that the template matches the correct game or event type.
If no template exists, continue creating the event manually.
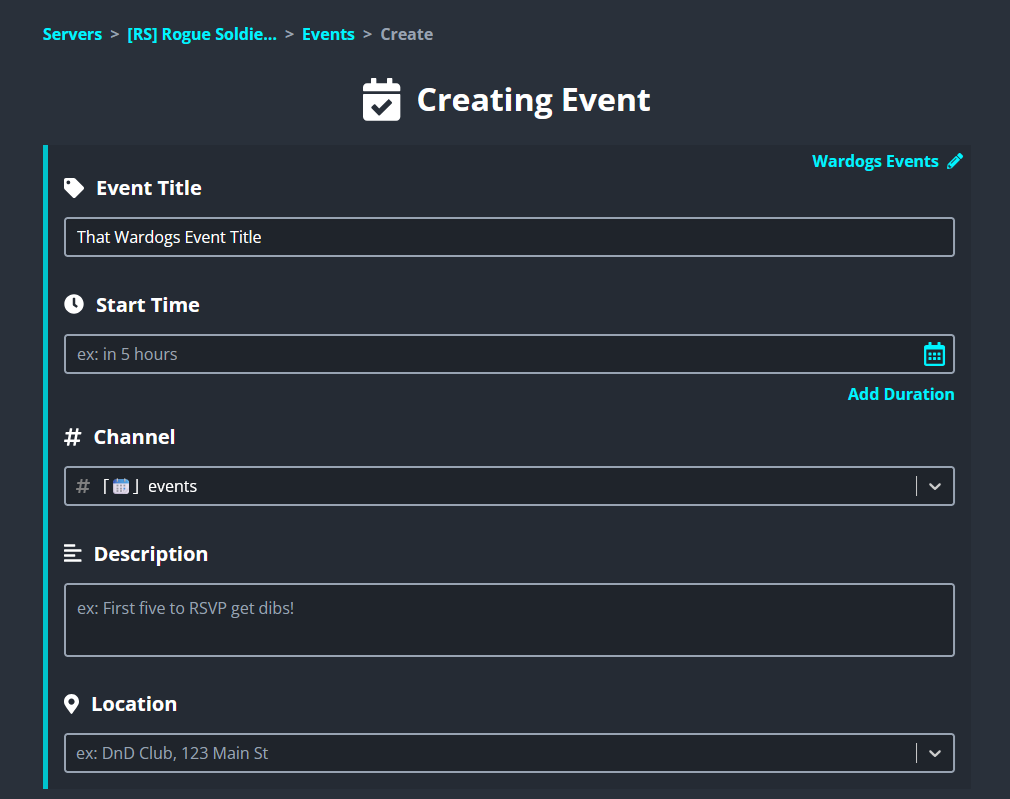
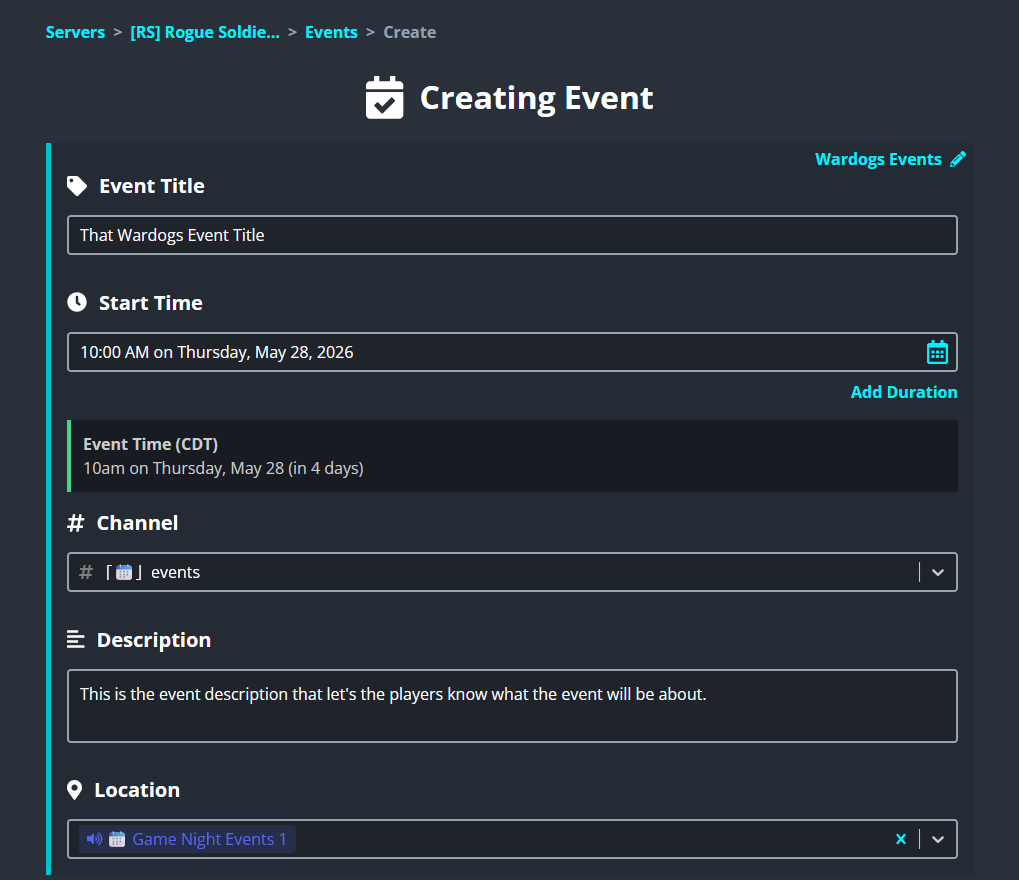
Step 4 — Enter the Event Title #
Create a clear and descriptive title for the event.
The title should immediately tell members:
- What game or activity the event is for
- What type of event it is
- Any important format or mode information
Good Examples #
- BattleBit Community Night
- Hell Let Loose Vietnam Launch Party
- Ardem PvP Squad Operations
- Rust Weekly Wipe
Avoid vague titles that do not explain the event clearly.
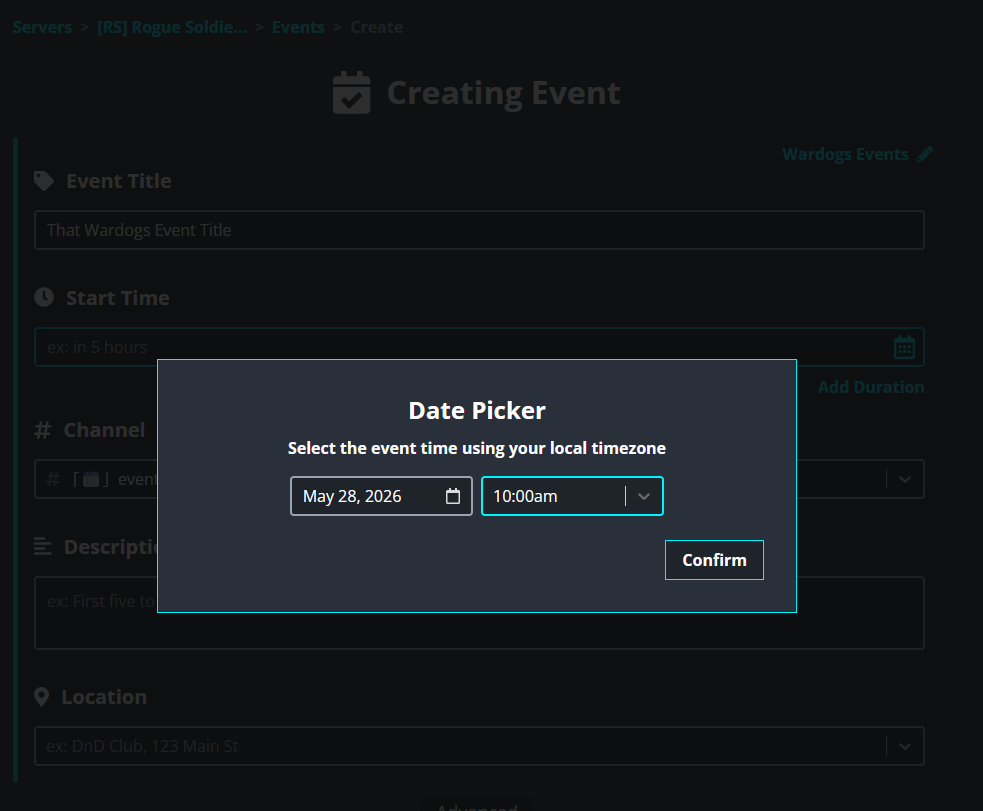
Step 5 — Choose the Event Date and Time #
Select the correct:
- Event date
- Start time
- Time zone (if applicable)
Double check all scheduling information before continuing.
Make sure the event:
- Does not conflict with another major event
- Gives members enough notice
- Matches any promotional graphics or announcements already made
Step 6 — Enter the Event Description and Location #
The event description should clearly explain:
- What the event is
- What players will be doing
- Any requirements or expectations
- Whether players should prepare anything beforehand
- Any special rules or event details
Descriptions should be detailed enough that members understand the purpose and structure of the event before joining.
The event location should always be one of the designated game night voice channels.
Before selecting a voice channel:
- Verify the channel is correct for the game
- Ensure the channel is not already being used by another event at the same date and time
This is important to avoid overlapping voice channel usage.
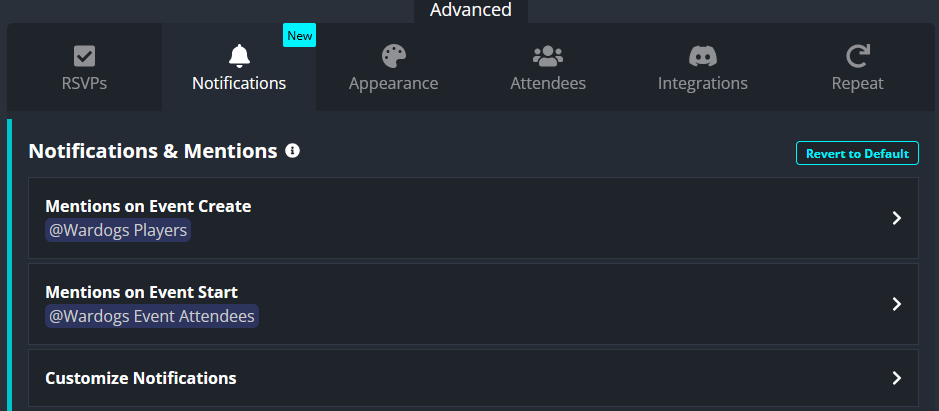
Step 7 — Configure Event Notifications and Roles #
Proper role configuration is extremely important for event visibility and notifications.
If using a template:
- These settings should already be configured correctly
If creating the event manually:
Mentions on Event Create #
Set this to:
- The primary role for the game or activity
Example:
- BattleBit role
- Hell Let Loose role
- Ardem role
Mentions on Event Start #
Set this to:
- The attendees role associated with the primary role
This allows only interested attendees to receive reminders.
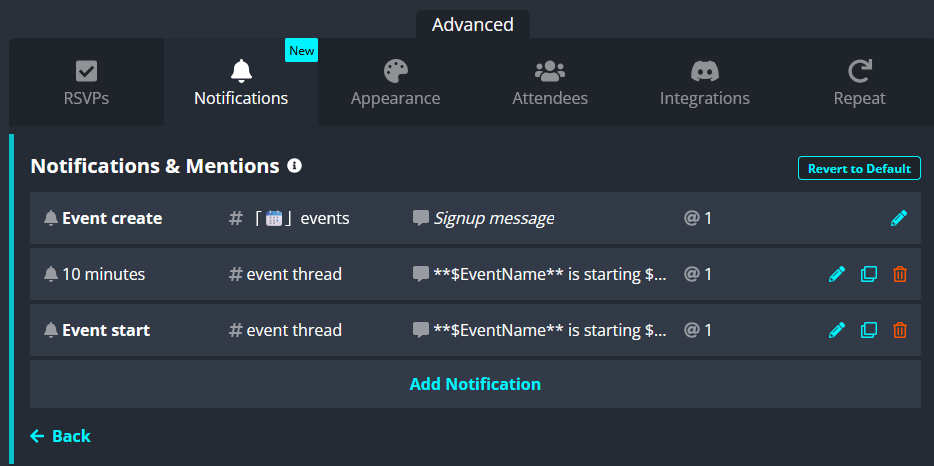
Step 7A — Customize Notifications (Recommended) #
Click Customize Notifications.
It is recommended to:
- Add a notification approximately 10 minutes before the event starts
This notification should:
- Ping the attendees role
- Encourage players to begin gathering in the voice channel
This helps improve turnout and ensures players are prepared before the event officially begins.
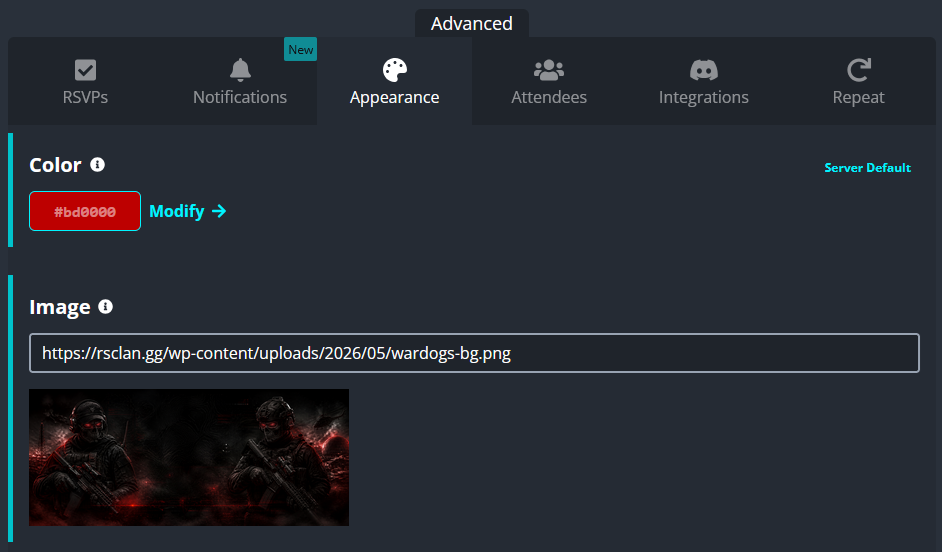
Step 8 — Add an Event Image #
Add an image URL for the event.
This image:
- Appears on the event post
- Helps visually identify the event
- Improves event visibility and engagement
If using a template:
- An image should already be configured
The same image should also be used later for the Discord native event integration.
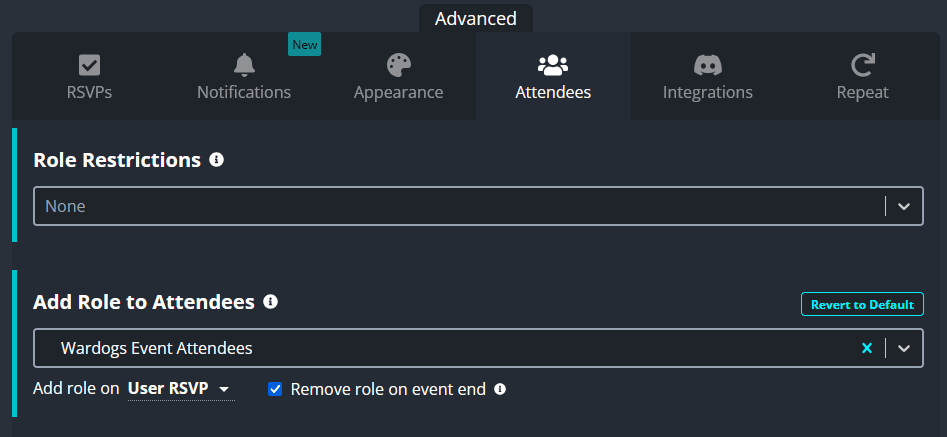
Step 9 — Configure the Attendees Role #
Locate the Add Role to Attendees setting.
Select:
- The attendees role associated with the primary game role chosen earlier
Also ensure:
- Add role on User RSVP is enabled
This is important because it:
- Automatically gives attendees the proper attendee role
- Allows future notifications and reminders to target only interested members
Double check the selected role before continuing.
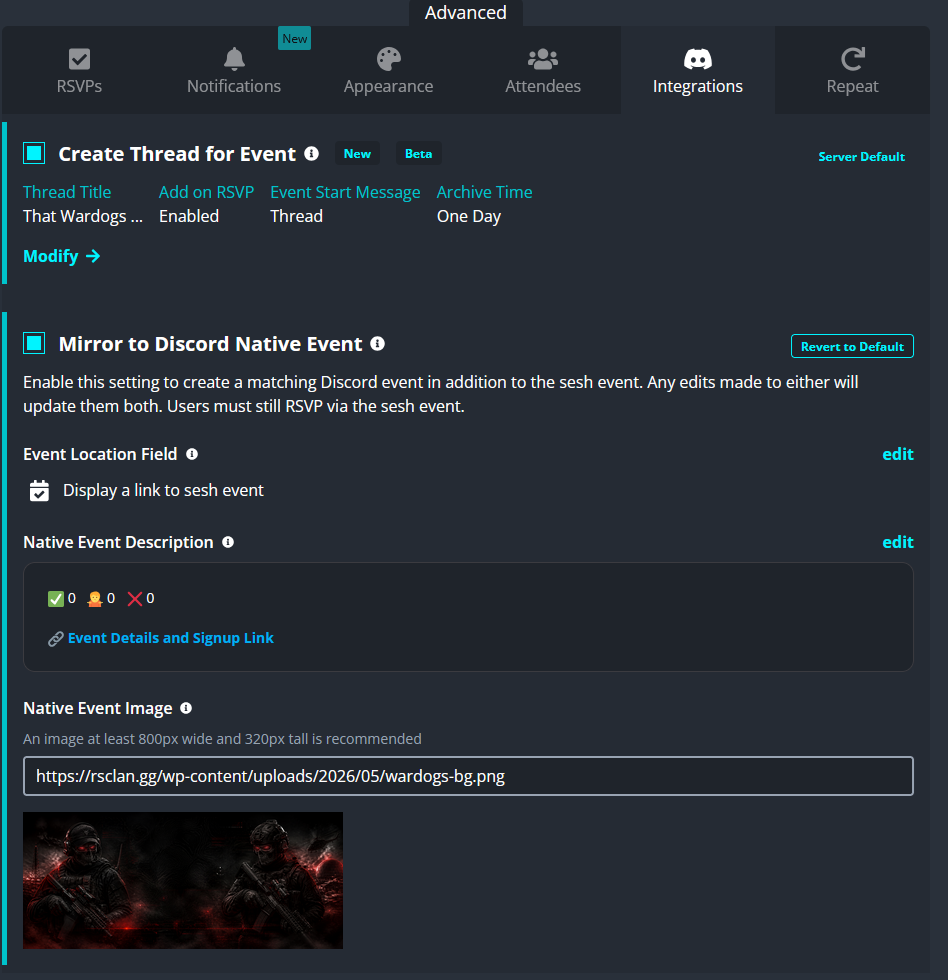
Step 10 — Configure Discord Integration Settings #
Several integration settings must be configured correctly for proper Discord event syncing.
Ensure the following are enabled:
- Create Thread for Event
- Mirror to Discord Native Event
If using a template:
- These settings should already be enabled by default
You will also see the event image URL field in this section. Ensure it matches the image used earlier.
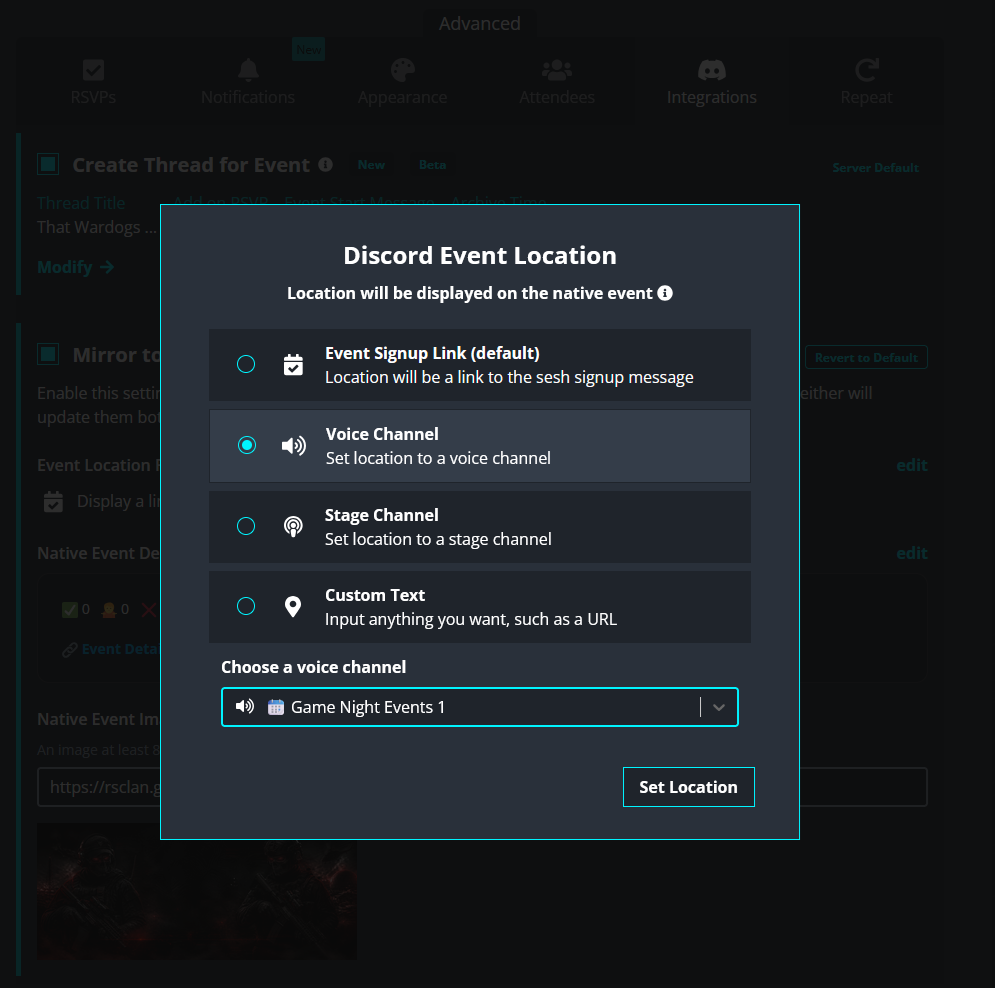
Step 10A — Configure the Native Event Location #
Under the Discord native event settings:
- Click Edit
- Set the Discord native event location to the exact same voice channel used earlier in the event setup
This is extremely important.
If the locations do not match:
- Members may join the wrong voice channel
- The native Discord event may direct players incorrectly
Always verify that both locations are identical.
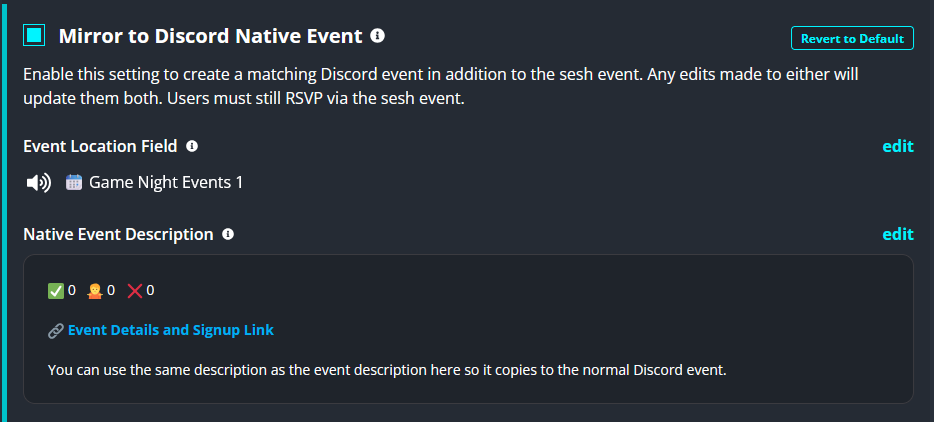
Step 10B — Configure the Native Event Description #
Edit the Discord native event description.
It is recommended that you:
- Reuse the same description from the main event
- Or use a shortened version of it
The native event should still clearly explain:
- What the event is
- What players should expect
- Any important participation details
This keeps both the Sesh event and the Discord native event consistent.
Step 11 — Optional: Recurring Events #
Recurring events can be configured if needed.
However, recurring events are generally not recommended because:
- Event details may change
- Voice channels may change
- Images or descriptions may need updating
- Notification settings may need adjustment
Recurring events are best reserved for events that stay mostly identical each time they occur.
Examples #
- Rust wipes
- Weekly tournaments
- Scheduled training sessions
- Routine game nights with fixed formats
If you choose to use recurring events:
- Double check all recurrence settings carefully before saving
Final Review Checklist #
Before publishing the event, verify the following:
- Correct title
- Correct date and time
- Correct voice channel selected
- No voice channel conflicts
- Proper game roles selected
- Attendees role configured properly
- Notifications configured properly
- Event image added
- Discord native event enabled
- Native event location matches the event location
- Native event description configured
- Thread creation enabled
Once everything is verified, create the event and confirm that:
- The event post appears correctly
- The Discord native event was generated properly
- Notifications and role settings appear correct
- The event thread was created successfully